Texturing
Intro
ULTRAKILL use a certain UV scale level on its faces. Most of them are 0.2 but there are some exceptions for terminals, weapons, etc. In this page you will learn how to properly apply textures on your geometry.
Textures are images, while materials is what is applied onto the geometry. Remember to use materials instead of textures.
Object Texturing
To apply a material onto an object, simply drag the material from project file explorer onto the object. You can find all the materials in ULTRAKILL Assets/Materials/.
Face Texturing
At first, you will only need to apply a material onto the whole object. However, to give your environment a better look, you might want to add more materials onto the same object. In ProBuilder, you are able to create more faces, apply materials on specific faces and manipulate them. For that, ProBuilder provides tools such as:
Subdivide Faces: Used for dividing a face to smaller faces;Connect Edges: Used for creating a new edge, thus splitting a face in two(available inEdge Manipulationmode.);Subdivide Edges: Used for dividing an edge into two;Connect Vertices: Also used for creating a new edge, but provides a finer control by you being able to move individual vertices inVert Manipulationmode.
These functions are usually enough for making high quality texturing, however you can use different functions or opt out into using Blender if you are familiar with it.
Face Texture Manipulation
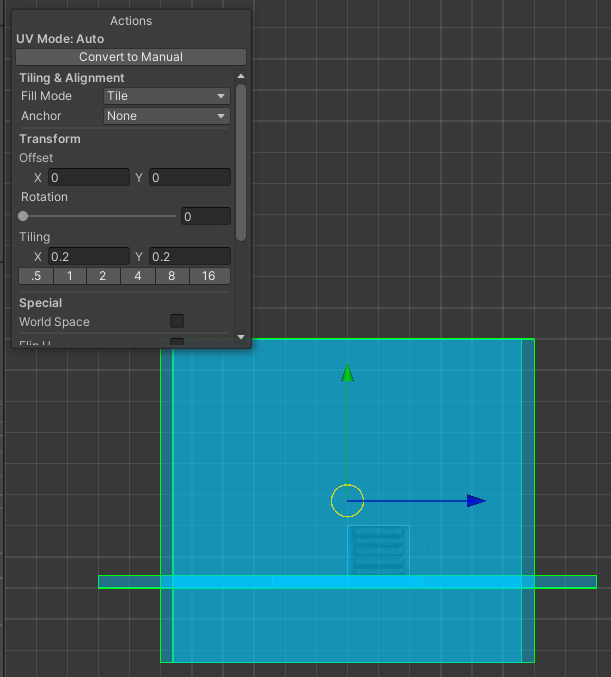
After you apply a material, you can immediately see that the texture on the face appear to be too small. This can be fixed by changing the tiling scale in UV Editor.
To do so, open UV editor in the ProBuilder window. In there, set the scale to 0.2 both in X and Y axises. You can also change rotation and location of the texture. By pressing the gizmo button in the UV window, you will be able to manipulate the texture in the scene itself.